Welcome to

Welcome to

Latest Updates

How to Recover deleted messages From WhatsApp Chat

Posted By: Vishwa - 6:30 AM

One of the best platform message apps that cut across at all time is WhatsApp. Almost everyone that have android phone have WhatsApp messenger as their essential daily activity which must fulfill everyday due to the ability to receive and send messages. With WhatsApp messenger chat, one can send and receive unlimited messages at a faster rate with a clean user interface. This has really makes this platform messenger one of the best in the internet world most especially for those people using Smartphone or android.

These days, WhatsApp has become one of the daily activities among the Smartphone users not minding whether you are a student or business man. WhatsApp is being used by the student for chatting with their friends or by business man to send some messages instantly to their customers more so that people are very active on WhatsApp more than any other social networking sites or emails. Therefore, it is very obvious that there are numerous exchange activities on WhatsApp and this has become so significant to every users daily living. Now, there are some things you need to know has users of WhatsApp. In case you delete some messages or chat on your WhatsApp and they are very crucial to you, what do you need to do in order to get them back? Does it mean that all the deleted messaged have been totally deleted forever? Relax! You have nothing to worry about because every messaging app is build with backup and restore options including that of WhatsApp. Hence, I need to shed more light for you on how to recuperate messages expunged from WhatsApp from your Smartphone or android.

Messages on your WhatsApp are stored in your android devices phone memory. You can recover all the deleted messages by going through some steps which are very simple to follow. WhatsApp use daily backup most especially at 4am and this is automatic. You can restore all your WhatsApp messages which you have sent or received up till that time. Therefore, here is the step by step guide on how you can restore your deleted messages form WhatsApp platform on your android device:

  • Go to “Settings” on your android phone, tap on “Applications Option” and click on “WhatsApp.”
  •  Tap “Clear data” once, warning message will come up. Just click on “Ok. This shows that you have deleted all the messages including the data of your app.
  • Go and restart your WhatsApp messenger app. Since you have removed all the data saved , you will be welcomed with configuration screen on your WhatsApp.
  • Configure your WhatsApp again by entering your mobile number, then presented it with message “Backup Found”. Tap on the restore button.
  • clicking on the restore button, you have restored the old messages successfully. It is only based on your chat history that your messages will be restored.
  • Immediately this is completed, your configuration message will show including the number of messages your system is able to recover. Process completed. Now you have successfully restored all the deleted chat messages.

How to Recover Images and Videos Deleted From WhatsApp

Anytime you want to view videos or images on your WhatsApp messenger, I want you to know that these image and video get saved in your phone memory before you can watch it on your android screen. Therefore, by closing the app does not imply that the image or video has been deleted, it is already saved in your Smartphone or android. You can watch the files by using default file manager. All what you need to do is to go to “File Manager” navigate to “WhatsApp folder” and tap on the “Media folder.” In this place, you will see all your videos and images folder. You can easily access the files by going into the respective folder.


How to Verify Account using temporary Email Address?

Posted By: Vishwa - 9:00 PM

 Friends nowadays almost every site having a registration system prompts for your email address and requires you to verify it. But in some cases it results into frustating moments when you get lots of spam messages from their website. so I’ve listed how to Verify account without actual Email Address (Using temporary Email addresses).

What are Disposable Emails?

Disposable emails provides a unique email address for any user which can be disposed anytime. It doesn’t require any registration for usage which can save you a hell lot of time.

Why use Disposable Email?

  • Many webmasters sell the email subscription lists to email marketers which causes uninterpreted spam to our inbox
  • Disposable Email serves as Spam Killer
  • You can create and confirm multiple accounts on the go without need of creating alternative email accounts
  • Temporarily receive and read emails without having an actual e-mail account

How to use?

  • No need to create an account on these types of websites.
  • Just visit one of the below website.Enter “Email address” of your choice or copy address given by them.
  • Use with any site which offers registration of an account.

Best Disposable Email Services

  • temp-mail.org - Temp Mail provides temporary, secure, anonymous, free, disposable email address.
  • mail.tm - Protect your personal email address from spam, bots, phishing and other online abuse. Temporary anonymous email address - no commitments and no risks.
  • temp-mail.io Free disposable temporary email address to keep your personal email safe and clear from spam and viruses.
  • 10minutemail.com By visiting this site, you will be given a temporary e-mail address. Any e-mails sent to that address will show up automatically on the web page. You can read them, click on links, and even reply to them. The e-mail address will expire after 10 minutes.
  • GuerrillaMail is a leading Disposable Email provider with a spam-free and ad-free interface. Create a temporary email thats lasts for an hour. It has multiple email domain support.
  • Dispostable and Mailnator are other two facades in Disposable Email industry. There only support single domain and have POP3 compatibility.
  • YOPMail Create a disposable and temporary email on YOPMail with out actually visiting this site email formatid@YOPMAIL.com but id should be unique.
  • Incognito Mail allows you to register at other websites without giving away your own e-mail address. Instead, create a secure, anonymous, temporary and disposable e-mail account that’ll last 60 Minutes. Enough time to receive e-mails that contain activation or download links, and to reply to e-mails that ask for confirmation.
  • Fakeinbox. Nice and cleans design , use RSS feeds of your inbox emails. Initial expire time 60 Minutes which can be extended.

WhatsApp Tricks and Tips That You must know!

Posted By: Vishwa - 1:56 AM

We all use WhatsApp in our daily life and I can say it has became a part of our daily life cycle but may be we don’t know some of its secret tips and tricks that can improve the productivity of WhatsApp messenger. We can say that because WhatsApp is the one of the most used app world wide by its 600 million active users and it is increasing day by day! WhatsApp already started totally free service in many countries like India to increase the number of active users. So, if you’re using WhatsApp on daily basis then you must know this WhatsApp Tricks and Tips.

As I said above, In this article I am going to uncover some hidden Whatsapp tips and tricks that most probably you don’t know! The tricks will cover major topic like WhatsApp Hacks, WhatsApp cheats, WhatsApp Tricks, WhatsApp Tips for Android as well as some of trick will also work on iPhone or iOS devices.

10 WhatsApp Tricks and Tips That You must know:

#9 WhatsApp Picture Trick:

Did you ever received an Image with the different thumbnail! i.e before your download a blurry image of a sexy girl will come in your Whatsapp and when you hit the download button it will become a image of a monkey or anything else which will troll you.

If you also want to troll your friends the checkout this WhatsApp Picture Trick of Thumbnail change.


#8 Generate Fake Screenshot of WhatsApp Conversation:

Did you ever received screenshot of the WhatsApp chat from your friend? showing his/her conversation with the someone else… It may be fake conversation.


#7 Hide WhatsApp Images & Video from Android Gallery:

When you download any media from WhatsApp it can be see into Android Gallery. Sometime Images and Videos which revived are private.

If you want to hide that Images and videos from gallery then there is a small trick that you need to perform checkout that trick to Hide WhatsApp’s Images & Videos From Android Gallery.

#6 Change DP of your Friend:

It is really not possible to change the dp (profile picture) of someone else in WhatsApp but you do a prank by following this trick.

By following this steps it will change the WhatsApp Profile Picture of your friend but it will only change to the device on which you perform this trick :


Download a funny or shocking image that you want set as your friend’s dp.

After downloading it resize it to 561 x 561 Pixel dimension using ‘RIOT image resizing’.

Now find your friend’s dp in SD card/Whatsapp/profile pictures folder.

It will be named with your friend’s name and number all you need to do is just replace his dp with the funny or shocking resized image that you’ve created.

So, this is how you can Change the Profile picture of your friend on WhatsApp.


#5 WhatsApp on PC (Using WhatsApp Web):

WhatsApp has launched his one of the most awaiting feature, its WhastApp web. So now you can chat from your PC or Laptop from the browser using its web version.

For this all you need to do is go to the WhatsApp Web Website and then scan the QR code from your phone and start chatting from Web browser.


#4 Disable WhatsApp Message Read Receipts:

As we all know Whatsapp is know showing the blue check marks which denotes that the message is read by the recipients but did you know that under privacy settings you can disable that WhatsApp blue checkmarks.

Checkout method to Disable the WhatsApp Read Receipts or Blue Checkmarks.

#3 Use 2 WhatsApp in a Single Android Phone:

We all use dual sim phones nowadays! but what if we want to use 2 WhatsApp in a Single phone? There is one trick available using it now you can use 2 WhatsApp accounts in a Single Android phone.

Checkout that Trick to use 2 WhatsApp account in a Single Android Phone.

#2 Use WhatsApp on Tab which does not have SIM slot:

If you have a Tablet which does not have a sim slot and you want to use WhatsApp on it then no need to worry! Now you can use WhatsApp on tablets without sim with this easy trick.

Checkout this trick How To Use Whatsapp On Tablet Without Sim Card.

#1 Turn of Auto Image & Video Download:

If you are using a limited data plan then this trick will help you to save your data by simply turning off auto download of images and videos.

Just like me if you are a member of many groups and receiving many images and videos daily in groups then it can eat your mobile data very quickly! so why don’t we download things which we actually want to download? for this you need to turn off the auto download option in Whatsapp setting.

To turn off auto download navigate to WhatsApp settings > Chat setting > media auto download and there change setting of auto download as per your requirement.

Final Verdict…

So, I hope this WhatsApp Tricks and Tips will be helpful to you to improve your experience with the WhatsApp Messenger. as I said earlier it is covering WhatsApp Hacks, WhatsApp cheats, WhatsApp Tricks, WhatsApp Tips for Android, iOS & Windows.

If you found this article is helpful to you & if you want more articles in your Inbox then join to our free email newsletter service. Thank for reading, Have a great day ahead! 

How to Connect Your Twitter Account to Facebook

Posted By: Vishwa - 8:53 AM

Associating Twitter to Facebook

If you like using Social Media sites chances are that you would have a Facebook account and also a Twitter account. Both of these permit you to make upgrades to your status. By making an association between these two records you just need to compose your message once as it will be presented on the other one naturally.

How to connect Twitter to your Facebook Account
I am explaining how you can utilize Twitter account for simply composing your message on your Twitter record and it will be posted naturally on your Facebook account. You will see it on your Facebook profile page and it will show up on the Facebook News Feed. Here is the manner by which you can do that in only a couple of basic steps.

Linking Your Twitter Account to Your Personal Facebook Account


In this association when you compose a message on your Twitter account it gets naturally posted into your Facebook status and Wall. Here are 4 straightforward steps how you can make that association. You should be signed into your twitter account to do this.

Step 1 – Login to your Twitter Account

Login to your twitter account that you want to connect with your Facebook account. Click on the Settings menu.
Select Settings in Twitter

Step2 – Go to Apps in setting menu

After clicking on setting menu go to the Apps. This is where you will found the facebook app to connect Twitter to facebook Account

Select Apps in Setting Menu in Twitter

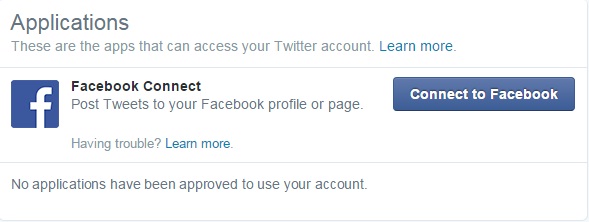
You will find the below screen in your Twitter account where it gives you option to connect Twitter to Facebook.

Connect Twitter to Facebook App

Step 3 – Connect to Facebook

Click on Connect to Facebook button. And it will pop up the window showing the login screen to Facebook, if you are not already logged in to facebook. Then sign in to your Facebook account with which you want to connect twitter account.

First it will ask to permission to receive the following information I.e. your public profile and birthday.

Click on “Okay” button if you are fine with it.

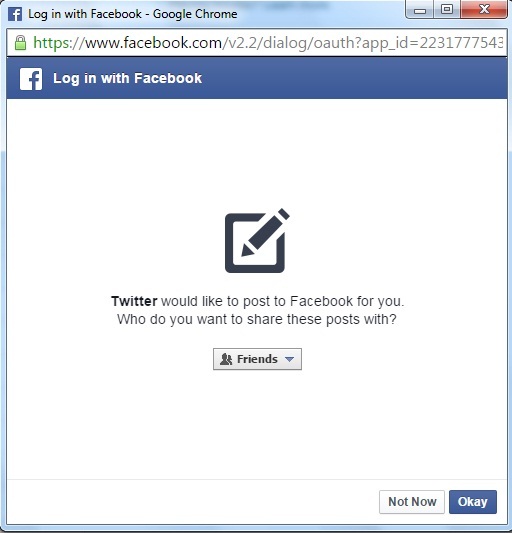
Login screen to Facebook


After clicking on OK button it asks for the permission to post to Facebook for you. You can set the privacy that with whom you can share these posts. Select the appropriate privacy settings and click on “Okay” button or you can choose “Not Now” if you want.

twitter connecting facebook asking permissions

Step 4 – Yes you finally did it and Last step…

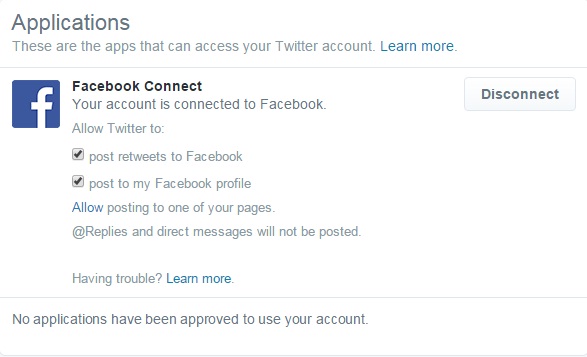
Congratulations you have connected your Twitter account to Facebook account. Now it shows on your Twitter profile that your Twitter account is now connected to Facebook account. Now just do the settings to allow Twitter what exactly you want to post and it’s done.
Twitter now connected to Facebook


You have now associated your Twitter account with your own Facebook account. Each time you compose another Twitter post it will now consequently appear on your Facebook Profile.

How to Use WhatsApp on PC using BlueStacks?

Posted By: Vishwa - 1:45 AM
WhatsApp is multiplatform mobile phone messaging service app for Smartphone. It is the most downloaded messaging app across the web. You can download this app from WhatsApp official site according to specifications of your Smartphone.

How install whatsapp on PC using BlueStacks
Some of the features of WhatsApp are:
1.       No Hidden Cost
2.       When you install you can send messages to your contacts
3.       You can send multimedia files like Photos, Videos and Audios
4.       You can send contacts
5.       You can create group of your friends and can add up to 100 friends and can chat with them at              once
6.       And recently new feature added by WhatsApp, you can make phone call using WhatsApp


WhatsApp Specifications and Features
How to install WhatsApp on PC:
  • For using WhatsApp on your PC first you have to install BlueStacks app player. You can download this software from their official site. Bluestacks is particularly designed for Windows and Mac OS to run android applications on your PC. It is available to download free of cost.
  • Once you have installed BlueStacks app player on your PC you can ready to install WhatsApp on your PC.


There are two ways you can install WhatsApp using BlueStacks
Method 1:
  1. You can download WhatsApp apk file.
  2. Then Double click on WhatsApp.apk file. This file automatically installs Whatsapp on your PC in BlueStacks App Player.


Method 2:
  1. First Click on search icon in BlueStacks and search for WhatsApp and enter find.
  2. After you found the WhatsApp application in app store, click on the install button.

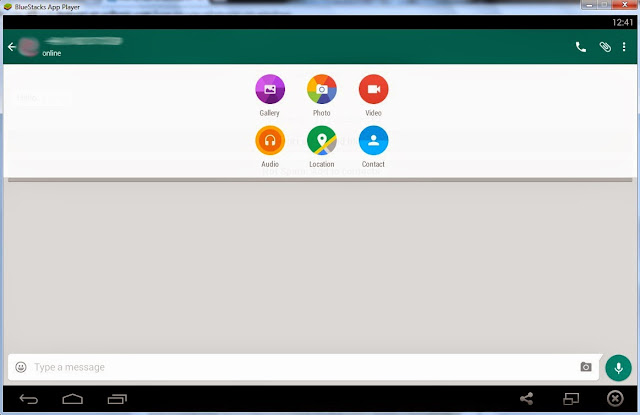
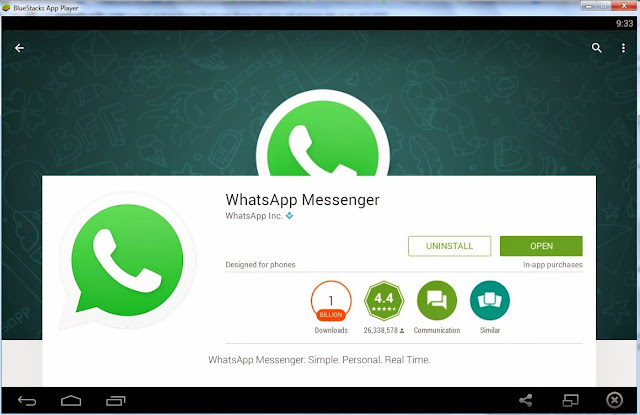
WhatsApp installation

  • Once you have installed the app on BlueStacks you can launch the Whatsapp
  • After that you need to enter your phone number and then click on verify.
  • Now wait for sometime as WhatsApp tries to send you message for verification.
  • If it fails to verify you with message then it also offers you the voice verification. Click on call me button.
  • Then you’ll get a call and also you can hear the verification code after you answer that call.
  • Just enter the verification code and you are ready to use WhatsApp on PC.
  • None of your existing contacts will show in WhatsApp but you can reply to the messages you receive.
  • You can add the contacts by clicking on the top-right Contacts. You can search and add the contacts.
  • And you can’t use WhatsApp on both that is on your PC as well on your mobile simultaneously. You can use it on either on mobile or on PC.

For any help you can drop a comment. I will try my best to solve the problem.
Did you install WhatsApp on PC using BlueStacks? Let us know… 

Easily Unlist or remove your number from TrueCaller

Posted By: Vishwa - 5:34 AM
Many of you aware what is TrueCaller and what exactly it does? It is the app that useful to know the person’s name who’s calling you, not necessary that contact number is save in your contact list or not. I am going to give you the small introduction of this application.

What is TrueCaller ?
As I said it lets you know the person’s name who’s calling you. You can search the contact information in your normal phonebook as well as you can search for any number that is not present in your phonebook. TrueCaller has database of more than 1 billion peoples from which you can search for your exact match for the specified person.
TrueCaller Application

Advantages:
1)      You can block calls which are reported as spam.
2)      TrueCaller make personal contact suggestions based on time and place.
3)      You can report specific number is spam so that other users also get alert.

How does TrueCaller Work?

It's interesting question we always want to know about this app that how does it work and how it gives you the information about any number. So here is the answer, when a user download the application, installed in the smart phone and registers for TrueCaller app, it ask for user’s permission to upload contact safely from their phonebook to the global collaborative directory. As soon as you allowed the permissions it synchronizes your contact list information and save it to the global directory.
How Truecaller works

Now whenever you search for the number it will search that number in the global directory where all contact details are saved and gives you the appropriate results. Sometimes there is possibility that one number can be saved with different name format on different phones. Then it shows the first result in alphabetical order.

TrueCaller is available for Android mobiles, iOS, BlackBerry, Symbian mobiles, Windows Mobile, Windows Phone 7, and Windows Phone 8. The application is available in all countries.

There are many peoples who don’t want to reveal their identity to the unknown persons. Certain persons have the security reasons or privacy issues so they don’t want to disclose any information about them.  Sometimes people want to remove their wrong information from the TrueCaller database. For those peoples, TrueCaller gives the solution to remove or delete their contact numbers from TrueCaller Database.
Note: Before you unlist your number from TrueCaller database first you need to deactivate your TrueCaller account. If you are not registered for the TrueCaller then you can follow the steps given below.

How to delete or remove your number from TrueCaller
Follow the following simple steps to remove your number from TrueCaller database:
STEP 2: Enter your phone Number including the country code
STEP 3: Select the appropriate reason or write your reason in the other section why you want to remove your number from TrueCaller.
STEP 4: Enter the Capcha.
STEP 5: And finally hit the blue unlist button at the bottom.
After pressing the unlist button it will ask you “Are you sure you want to unlist your phone number? This means you can no longer use the app”. Click on ‘OK’ and you will see that the blue button goes green with right mark on it. That’s it, you have successfully unlisted your number from TrueCaller Database!
TrueCaller will remove/unlist your number within 24 hours once the unlist request has been sent. You can search after 24 hours it will show you the message “The truth is out there” it means your number successfully removed from TrueCaller database.

Copyright © 2015 Tips and Tricks only for You.....™ is a registered trademark.

Designed by Templateism. Hosted on Blogger Platform.